Writing an Operating System Kernel in Rust a Roadmap
A plan for writing an operating system kernel in Rust: the order of milestones from booting to a shell, which crates help, what to read and the traps at each stage.
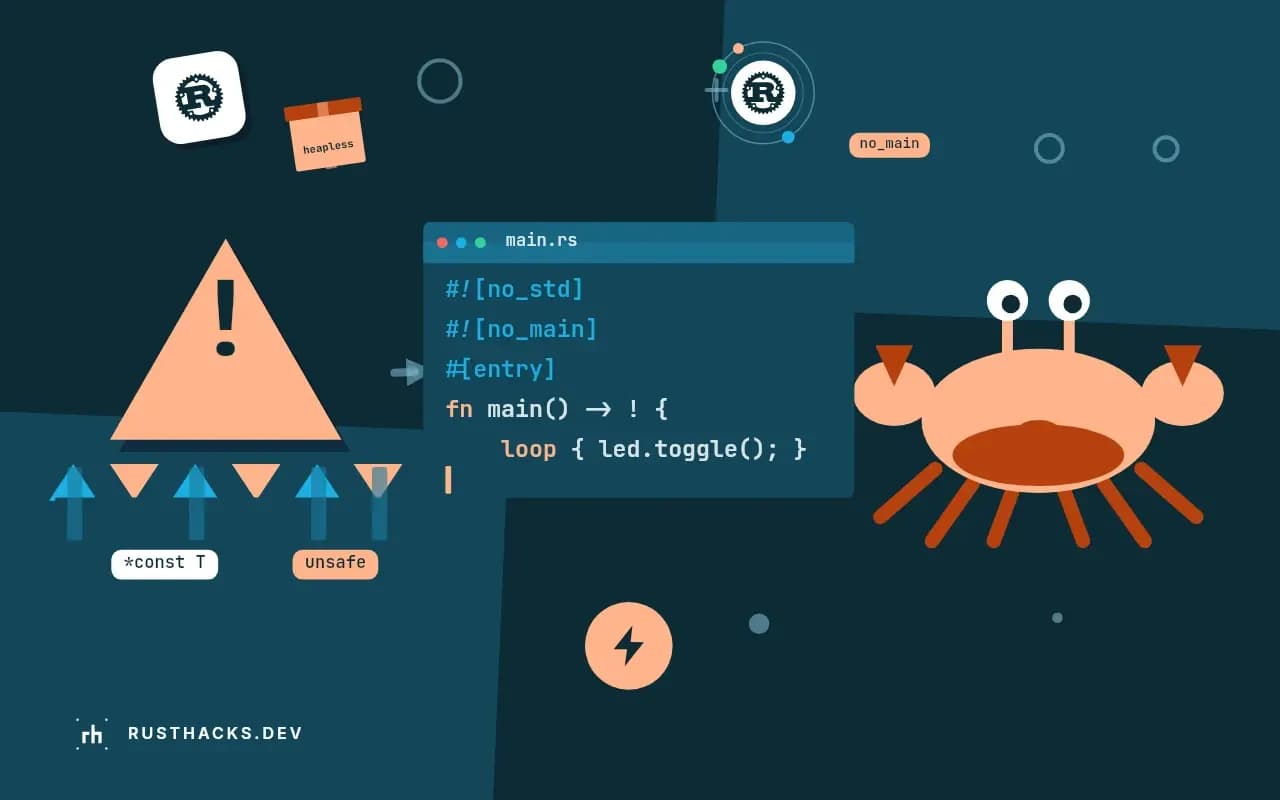
Writing an operating system kernel is the project that teaches the most about a computer, and it fails mostly because people attempt the stages in the wrong order. Interrupts before a stable panic handler, paging before a memory map you trust, a scheduler before a timer: each one turns every later bug into the same symptom, the virtual machine silently rebooting. This roadmap lists the stages of a small x86_64 kernel in Rust in the order that keeps failures visible, shows what each stage needs, and gives working code with real output from QEMU for the first six. Everything here was compiled and booted in QEMU 11.1 using the bootloader crate 0.11 and Rust 1.99 stable for the kernel crate (nightly 1.101 for the stages that use the x86-interrupt calling convention and for building the disk image). The boot procedure itself is the subject of booting a minimal kernel with QEMU; this guide begins where that one ends.
The shape of the roadmap
| Stage | Goal | You learn | Visible proof |
|---|---|---|---|
| 0. Boot | Freestanding binary that the bootloader starts | no_std, entry points, the boot info | A line on the serial port |
| 1. Output and panics | Serial output, a panic handler that cannot deadlock | I/O ports, spin locks | A panic message and a QEMU exit status |
| 2. Exceptions | An interrupt descriptor table with a handler | The IDT, the x86-interrupt ABI | "breakpoint" handled, execution continues |
| 3. Double faults | A GDT, a TSS and a separate stack for the double fault | Segmentation leftovers, the IST | A stack overflow reported, not a reboot |
| 4. Hardware interrupts | PIC remapped, timer interrupts counted | IRQs, masking, end-of-interrupt | Five timer ticks counted |
| 5. Memory | A frame allocator, paging control, a heap | Page tables, CR3, allocators | Vec and Box working |
| 6. Concurrency | Cooperative tasks on an async executor, then preemption | Wakers, context switches | Two tasks interleaving |
| 7. Devices | Keyboard, then a disk or network driver | PS/2 or PCI, DMA | Typed characters, a block read |
| 8. User space | A program running in ring 3 with system calls | Privilege levels, syscalls, ELF loading | A user program printing through a syscall |
Treat the rule as a dependency chain: each stage needs the previous one working and tested before you start it, because the next stage's bugs will not announce themselves. A kernel that cannot print or panic cannot be debugged at all, so output and the panic handler come before everything. A kernel without a double fault handler turns the next bug into a triple fault, which the CPU answers by resetting the machine. Hardware interrupts need exception handling working or any stray IRQ becomes a double fault. The heap needs a memory map you understand. And so on.
Stage 0 and 1: boot, output, and a panic handler that works
The first two stages are in the booting guide: a #![no_std] crate, entry_point!, a serial port at I/O port 0x3F8, isa-debug-exit to end QEMU with a status, and a panic handler. The one thing from there to carry forward is the lesson of the first real bug: the panic handler must not lock anything that the panicking code might hold. Build it to use force_unlock on the serial mutex (or write to the port without a lock) and test it by panicking on purpose before moving on. A panic handler is the one piece of code that must work when everything else is broken.
Stage 2: exceptions
The CPU reports errors (divide by zero, invalid opcode, page fault) by looking up a handler in the interrupt descriptor table (IDT). With no table, the first exception becomes a double fault and then a triple fault. Handlers use the x86-interrupt calling convention, which saves registers and returns with iretq; it is unstable in Rust, so this stage moves the kernel to nightly and adds #![feature(abi_x86_interrupt)]. The smallest useful experiment is a breakpoint, the exception raised by the int3 instruction, because it is harmless and returns:
#![feature(abi_x86_interrupt)]

use spin::Lazy;
use x86_64::structures::idt::{InterruptDescriptorTable, InterruptStackFrame};

static IDT: Lazy<InterruptDescriptorTable> = Lazy::new(|| {
    let mut idt = InterruptDescriptorTable::new();
    idt.breakpoint.set_handler_fn(breakpoint_handler);
    idt
});

extern "x86-interrupt" fn breakpoint_handler(frame: InterruptStackFrame) {
    kprintln!("EXCEPTION: breakpoint at {:?}", frame.instruction_pointer);
}

fn kernel_main(boot_info: &'static mut BootInfo) -> ! {
    serial_init();
    kprintln!("kernel started");
    IDT.load();
    x86_64::instructions::interrupts::int3();
    kprintln!("returned from the breakpoint handler");
    qemu_exit(0x10);
}
The table lives in a static because the CPU holds a pointer to it for as long as the machine runs; spin::Lazy builds it on first use without an allocator. Running this prints:
kernel started
EXCEPTION: breakpoint at VirtAddr(0x10000003adb)
returned from the breakpoint handler
usable memory: 127843 KiB
The handler ran, printed the address of the instruction after int3, and execution resumed in kernel_main. That is the whole contract of an exception handler, and every later feature (system calls, page faults, preemption) is a variation of it. Add handlers for the exceptions you can trigger deliberately (divide error, invalid opcode) one by one, and read the error codes in the Intel manual's table instead of guessing.
Stage 3: double faults, and the segment register trap
A double fault happens when the CPU raises an exception while trying to call an exception handler. The classic cause is a stack overflow: the stack pointer runs off the end of the stack, the CPU faults, and when it tries to push the fault's frame onto the same broken stack it faults again. Without a handler, the third fault (a triple fault) resets the machine. The fix has two parts: a handler for the double fault, and a known-good stack for the CPU to switch to when it takes one. x86_64 provides the interrupt stack table (IST), part of the task state segment (TSS), for exactly this, and using a TSS means building a global descriptor table (GDT) as well.
const DOUBLE_FAULT_IST_INDEX: u16 = 0;

static TSS: Lazy<TaskStateSegment> = Lazy::new(|| {
    let mut tss = TaskStateSegment::new();
    tss.interrupt_stack_table[DOUBLE_FAULT_IST_INDEX as usize] = {
        const STACK_SIZE: usize = 4096 * 5;
        static mut STACK: [u8; STACK_SIZE] = [0; STACK_SIZE];
        let start = VirtAddr::from_ptr(core::ptr::addr_of!(STACK));
        start + STACK_SIZE as u64
    };
    tss
});

struct Selectors {
    code: SegmentSelector,
    data: SegmentSelector,
    tss: SegmentSelector,
}

static GDT: Lazy<(GlobalDescriptorTable, Selectors)> = Lazy::new(|| {
    let mut gdt = GlobalDescriptorTable::new();
    let code = gdt.append(Descriptor::kernel_code_segment());
    let data = gdt.append(Descriptor::kernel_data_segment());
    let tss = gdt.append(Descriptor::tss_segment(&TSS));
    (gdt, Selectors { code, data, tss })
});

fn init_gdt() {
    let (gdt, sel) = &*GDT;
    gdt.load();
    unsafe {
        CS::set_reg(sel.code);
        SS::set_reg(sel.data);
        DS::set_reg(sel.data);
        load_tss(sel.tss);
    }
}
Notice the data segment. An early version of this code loaded only the code segment and the TSS. Timer interrupts then caused a double fault instead of being handled: the log showed a stack segment selector of index 2, which in the new table pointed at the TSS descriptor. The bootloader had left its own selectors in SS, and once the GDT was replaced those indices meant something else, so returning from an interrupt reloaded a stack segment that was not a stack segment. The cure is to load SS and DS with a proper data segment from the new table. This is the kind of bug the roadmap order is designed to expose early: with a double fault handler in place, it printed a frame and a selector that pointed straight at the cause, instead of a silent reboot.
The double fault handler is registered with the IST index, which tells the CPU to switch stacks before calling it:
extern "x86-interrupt" fn double_fault_handler(frame: InterruptStackFrame, _code: u64) -> ! {
    kprintln!("EXCEPTION: double fault\n{:#?}", frame);
    qemu_exit(0x12);
}

// in the IDT initialiser:
unsafe {
    idt.double_fault.set_handler_fn(double_fault_handler).set_stack_index(DOUBLE_FAULT_IST_INDEX);
}
To test it, recurse until the stack runs out. With the IST in place the machine reports the fault and exits with status 37 ((0x12 << 1) | 1) instead of rebooting:
overflowing the stack on purpose
EXCEPTION: double fault
InterruptStackFrame {
    instruction_pointer: VirtAddr(
        0x10000008452,
    ),
    code_segment: SegmentSelector {
        index: 1,
        rpl: Ring0,
    },
    ...
The instruction pointer is inside the recursive function. A kernel stack is small and has no guard that the language provides, so this fault will occur in every kernel you write; having a handler that names it is worth the hour it costs.
Stage 4: hardware interrupts
Devices (the timer, the keyboard) signal the CPU through a programmable interrupt controller. The legacy 8259 PIC is the simplest to use, and QEMU emulates it. Its interrupts default to vectors 0 to 15, which collide with CPU exceptions, so the first job is to remap them to 32 and up. The pic8259 crate does the remap, and two details decide whether the stage works: unmask only what you handle, and acknowledge every interrupt.
const PIC_OFFSET: u8 = 32;
static PICS: Mutex<ChainedPics> = Mutex::new(unsafe { ChainedPics::new(PIC_OFFSET, PIC_OFFSET + 8) });
static TICKS: AtomicU64 = AtomicU64::new(0);

extern "x86-interrupt" fn timer_handler(_frame: InterruptStackFrame) {
    TICKS.fetch_add(1, Ordering::Relaxed);
    unsafe { PICS.lock().notify_end_of_interrupt(PIC_OFFSET) };
}

// in init, after loading the IDT:
unsafe {
    let mut pics = PICS.lock();
    pics.initialize();
    pics.write_masks(0b1111_1110, 0b1111_1111); // only IRQ0, the timer
}
x86_64::instructions::interrupts::enable();
The masks matter: every unmasked line without a handler becomes a fault. After the end-of-interrupt write, the PIC delivers the next one; forget it and you get one tick and silence. The main loop waits cheaply with hlt, which sleeps the CPU until an interrupt:
while TICKS.load(Ordering::Relaxed) < 5 {
    x86_64::instructions::hlt();
}
kprintln!("timer interrupts received: {}", TICKS.load(Ordering::Relaxed));kernel started
EXCEPTION: breakpoint at VirtAddr(0x10000005a41)
timer interrupts received: 5Five ticks at QEMU's default 18.2 Hz is roughly a quarter of a second. Everything with a time dimension (sleep, timeouts, preemption) is built from this one counter. The spin mutex around PICS has a trap of its own: if the main code holds a lock that an interrupt handler also takes, the handler spins forever on a lock held by the code it interrupted. Disable interrupts while holding such a lock (x86_64::instructions::interrupts::without_interrupts) or keep interrupt handlers to atomics.
Stage 5: memory
Memory has three layers, built in this order. First, read the bootloader's memory map (the guide above prints it) and write a frame allocator over the usable regions. Second, take control of paging: read CR3 to find the active page table, ask the bootloader to map all physical memory at an offset (Mapping::Dynamic), and use the x86_64 crate's OffsetPageTable to map new pages. Third, put a heap on top. The quickest version of the third step, before the second is ready, is a static array handed to a general-purpose allocator:
extern crate alloc;

use alloc::{boxed::Box, string::String, vec::Vec};
use linked_list_allocator::LockedHeap;

#[global_allocator]
static ALLOCATOR: LockedHeap = LockedHeap::empty();

static mut HEAP_MEMORY: [u8; 256 * 1024] = [0; 256 * 1024];

// in kernel_main:
unsafe {
    let start = core::ptr::addr_of_mut!(HEAP_MEMORY) as *mut u8;
    ALLOCATOR.lock().init(start, 256 * 1024);
}
let mut v: Vec<u32> = Vec::new();
for i in 0..10 {
    v.push(i * i);
}
let boxed = Box::new(42u64);
let mut s = String::from("heap string");
s.push_str(" works");
kprintln!("vec = {:?}, box = {}, string = {}", v, boxed, s);
let (frame, _) = x86_64::registers::control::Cr3::read();
kprintln!("page table root (CR3): {:?}", frame.start_address());vec = [0, 1, 4, 9, 16, 25, 36, 49, 64, 81], box = 42, string = heap string works
page table root (CR3): PhysAddr(0x12f5000)The heap works, and so does the standard collection API: alloc gives you Vec, Box, String and Rc with the #[global_allocator] you chose. The static array is a placeholder. A real kernel heap maps fresh pages from the frame allocator into a reserved virtual range, so it can grow, and the choice among allocator designs (bump, linked list, fixed-size blocks) trades speed against fragmentation, a choice measured in allocators compared. Print CR3 once: the value is the physical address of the top-level page table the bootloader built, and from there the OffsetPageTable walks the rest.
A frame allocator and a look at the page tables
Before the heap grows, you need a source of physical pages. The simplest allocator is a bump allocator over the usable regions that never frees: it hands out 4 KiB frames in address order and remembers only where it stopped. Skip everything below 1 MiB, because the first megabyte holds BIOS data and real-mode leftovers that firmware may still use.
use bootloader_api::info::{MemoryRegion, MemoryRegionKind};

struct FrameAllocator {
    regions: &'static [MemoryRegion],
    region: usize,
    next_addr: u64,
}

impl FrameAllocator {
    fn new(regions: &'static [MemoryRegion]) -> Self {
        FrameAllocator { regions, region: 0, next_addr: 0 }
    }

    fn allocate(&mut self) -> Option<u64> {
        loop {
            let r = self.regions.get(self.region)?;
            if r.kind == MemoryRegionKind::Usable {
                let addr = self.next_addr.max(r.start).max(0x10_0000);
                let addr = (addr + 4095) & !4095;
                if addr + 4096 <= r.end {
                    self.next_addr = addr + 4096;
                    return Some(addr);
                }
            }
            self.region += 1;
        }
    }
}
The first version of this allocator in the experiment used the obvious iterator chain (filter, flat_map, step_by) and took the n-th item on every call. It compiled, and it is quadratic: each allocation re-walks every frame before it. With 30,000 frames that is hundreds of millions of steps in a debug build, enough to look like a hang. Keep the cursor in the struct, as above. Then use the physical-memory mapping you asked the bootloader for to read the active top-level page table:
use x86_64::structures::paging::PageTable;

let offset = boot_info.physical_memory_offset.into_option().expect("physical memory is mapped");

let mut frames = FrameAllocator::new(&boot_info.memory_regions);
let (a, b, c) = (frames.allocate().unwrap(), frames.allocate().unwrap(), frames.allocate().unwrap());
kprintln!("first frames: {:#x} {:#x} {:#x}", a, b, c);

let (l4_frame, _) = x86_64::registers::control::Cr3::read();
let l4: &PageTable = unsafe { &*((offset + l4_frame.start_address().as_u64()) as *const PageTable) };
for (i, entry) in l4.iter().enumerate().filter(|(_, e)| !e.is_unused()) {
    kprintln!("L4[{:3}] -> {:?} {:?}", i, entry.addr(), entry.flags());
}first frames: 0x100000 0x101000 0x102000
L4[ 0] -> PhysAddr(0x12a0000) PageTableFlags(PRESENT | WRITABLE | ACCESSED)
L4[ 2] -> PhysAddr(0x1284000) PageTableFlags(PRESENT | WRITABLE | ACCESSED)
L4[ 3] -> PhysAddr(0x128a000) PageTableFlags(PRESENT | WRITABLE | ACCESSED)
L4[ 4] -> PhysAddr(0x12a5000) PageTableFlags(PRESENT | WRITABLE)
L4[ 5] -> PhysAddr(0x12a9000) PageTableFlags(PRESENT | WRITABLE | ACCESSED)
L4[ 6] -> PhysAddr(0x14aa000) PageTableFlags(PRESENT | WRITABLE)
L4[ 7] -> PhysAddr(0x16ac000) PageTableFlags(PRESENT | WRITABLE | ACCESSED)The top-level table (level 4) has 512 entries, each covering 512 GiB of virtual address space, and seven are in use. Entry 0 covers the low addresses the bootloader identity-mapped while it ran; the others cover the kernel image at its high offset, the physical-memory window at 0x28000000000 (that is entry 5, since 5 × 512 GiB = 2.5 TiB = 0x28000000000) and the stack and boot info. Three frames from the allocator at 1 MiB, 1 MiB + 4 KiB and 1 MiB + 8 KiB confirm it works, and a loop that allocated until exhaustion got 30,763 more frames, about 120 MiB, which matches the 123,703 KiB of usable memory the same kernel reported once the kernel image and bootloader structures were subtracted. Reading page tables this way is the first move in every later memory feature: mapping a new page means finding or creating the right entry at each of four levels, and now you can see the structure you are editing. When you start mapping, use the OffsetPageTable type from the x86_64 crate instead of raw pointer arithmetic, and flush the TLB (x86_64::instructions::tlb::flush) after changing a live mapping.
Stage 6 to 8: tasks, devices and user space
With a heap, you can run more than one thing. The cheapest model is cooperative: tasks are async futures, an executor polls them from a queue, and a task yields when it awaits. It needs only the heap, wakers and a way to idle (hlt) when the queue is empty; it is the same machinery described in building a tiny executor, minus the operating system under it. The timer interrupt then gives you sleeping tasks, and a keyboard interrupt handler pushing scancodes into a queue gives you the first real device. Preemptive multitasking comes later: it saves the registers of the running thread on a timer tick and restores another's, and it is a context switch in assembly you should write once.
User space is the final stage and the one that makes it an operating system. It needs separate page tables per process, a GDT with ring 3 segments, the syscall/sysret instructions or an interrupt gate for system calls, and an ELF loader. Treat it as its own project after the rest is stable.
Testing each stage so it stays working
A kernel regresses silently, so every stage needs an automated check, and the check can be tiny. Give each stage its own kernel binary that exercises one feature and exits with a status: the breakpoint test prints its line and exits with 33; the double fault test recurses and expects status 37; the timer test expects five ticks and 33; the heap test allocates a Vec and compares. A shell loop builds each image, runs it under timeout 30, and compares the status to the expected one. That is a dozen lines and it catches the bug where stage 4 broke stage 3 before you spend a weekend wondering why.
Two refinements pay off quickly. Put the shared code (serial output, the exit device, the panic handler) in a library crate that every test kernel depends on, so a fix lands everywhere. And assert on output as well as the status: a script that greps the serial log for a line such as timer interrupts received: 5 catches a kernel that exits cleanly while doing the wrong thing. The same exit-code protocol is used by the test frameworks of mature kernel projects, which is a good sign that it scales beyond a toy.
How long each stage takes, and what to read
For someone comfortable with Rust and new to kernels, stages 0 to 2 are an afternoon each, stage 3 is a weekend (the GDT and TSS details are fiddly), stage 4 is a weekend, and stage 5 is the first one that can take a week, because paging is where the concepts are densest. Stages 6 and 7 depend on how far you push them; a cooperative executor and a keyboard are a weekend, a disk driver is a project. Do not skip the reading that matches each stage: the x86_64 crate's documentation is the best map of the structures; the OSDev wiki covers each piece of PC hardware, including the quirks that emulators hide; and the Intel manual is the authority when the two disagree. Philipp Oppermann's "Writing an OS in Rust" series follows nearly this order and is the standard companion; this roadmap's contribution is the exit-code test loop and the failure notes, not a replacement for it.
How to work through it
- Commit at the end of every stage. When stage 5 breaks stage 2, a tag lets you bisect.
- Keep the exit-code convention. Success 33, panic 35, double fault 37: a script can run every stage's test in seconds.
- Turn on QEMU's
-d intwhen a stage reboots; it prints each exception number as it happens. - Read the manuals, not just tutorials. The Intel Software Developer's Manual volume 3 describes every structure used here; the OSDev wiki is the practical companion.
- Expect to be on nightly for the interrupt ABI and for the bootloader build, as the table of failures in the booting guide shows.
What this roadmap is not
It is not a design for a production kernel. It targets a PC under QEMU, uses the legacy PIC where a real system uses the APIC, takes a bootloader's page tables on trust, and ignores SMP, power management and security. If your aim is to learn how the pieces fit together, that is the right scope. If your aim is a kernel for real hardware or a driver for an existing one, the better starting points are the Linux kernel's Rust support (Rust in the Linux kernel) or an existing Rust OS such as Redox, where the hard decisions are already made and the work is contribution, not construction.